Showing posts with label how-to. Show all posts

Tuesday, February 14, 2012

New Art - Now What?

You just received new art. Now what? What do you do with it? How do you display it?

The Miami Herald recently shared an article by Alexia Elejalde-Ruiz entitled The Art of Hanging a Painting. You can find the article here:

Life Skill #251: Hang a Painting

The article by Elejalde-Ruiz goes very well with a blog post I wrote entitled How to Choose a Frame for a Painting. You can find that blog post here:

How to Choose a Frame for a Painting

The drawing included here is courtesy of the same article and was drawn by Rick Tuma of the Chicago Tribune.


Feel free to send photos of how you hung art in your home! It would be fun to share on this blog. You can send the small jpegs to angeline@angelinemarie.net

Smiles!!!!
Angeline Marie of

Tuesday, April 5, 2011

10 Ways to Keep You and Acrylic and Mixed Media Paintings Happy

Acrylic & Mixed Media Painting Care
Paintings on Canvas or Canvas Board 
10 tips to keep you and your painting happy.
  1. Keep painting out of direct sunlight and away from heat sources such as ovens, attics or furnaces.
  2. Temperatures between 40 and 100 degrees Fahrenheit are best to keep paint from becoming brittle or softening. Indoor air conditioning is fine, especially to avoid mildew.
  3. Use only water to clean surface, and only when necessary. 
  4. A dry soft clean towel, feather duster, or soft brush can be used to remove dust from the painting. Remember to be gentle. Swab the surface (touch and lift) is the best method when using a cloth. 
  5. Do not rub or scratch the painting. 
  6. The mixed media elements may include beach sand, sawdust, coffee, and other items. Sand, sawdust, and other textures like them may fall off the painting and is part of the aging process. Again, do not rub the painting. 
  7. If a mixed media element falls off of the painting, carefully use an acrylic matte gel paint to re-attach it. 
  8. Keep fingers off the painting. 
  9. Use a compressed air can to remove dust.
  10. Keep painting away from airborne dust, dirt, cigarette or cigar smoke, etc. that may land on the painting. 
Sources used for these tips:
Smiles, 
Angeline Marie of 
Angeline Marie Fine Art
Facebook Page for Angeline Marie Fine Art

Tuesday, March 22, 2011

Rules of Composition by Guest Jason Eldridge


Guest Author: Jason Eldridge of Eldridge Studios wants to make it known that he is a photographer and not a painter.  It is important to make that distinction because of the difference in how the art is created.  There are however, aspects of photography that can benefit from the painted art.  Painting has been around for more than a millennial where as photography not quite two centuries.  Yet, many photographers forget that the word itself means “painting” with light.  While every aspect of painting does not transfer to photography there is a great deal that does.  


Every good painting has a subject. Not only does it have a subject but your eye is drawn to that subject by elements within.  One fundamental rule you should commit to memory is that the human eye is drawn to the lightest part of the image (or painting) first. 

There are some effective ways of drawing attention to your subject.  Here is a quick list of what paintings can teach you about photography:

Technique:  When you look at a painting that is technically sound you see the artist’s vision not the individual brush strokes.  Now, as you study the image the method used to create the painting will be discovered but your initial thought of the art work isn’t “I wonder what kind of brush they used”. 

In photography the Exposure Value can have the same effect.  You want people to see the image not some areas that are blown out or are too dark.  You have to understand the technical aspects of photography in order properly show your artistic vision. Watch out for blown out highlights around the edges of the frame. If you are going for a blown out look it may be effective but if that is not your intent it can be very distracting.

Leading Lines:  These are items within the painting or photograph that “lead” your eyes directly to the subject.

Sharp Eyes: If you are photographing (or painting) people or animals it is vital to keep the eyes sharp. If the eyes are not sharp the viewer will instantly know and this does not always provoke a positive response.  Why? Because our eyes are instantly drawn to the eyes of other creatures. It is just the way we as humans are designed.

Rule of Thirds: Using the rule of thirds helps to improve your overall photograph or painting but it also acts as a draw to the subject (provided the subject is defined). Again, you should not always use this rule for every photograph or painting but you will find it effective most of the time. Make sure that you understand the rule before you break it.

Depth of Field: This is a fantastic method of drawing the eye. If you have a very shallow depth of field (sharp subject with an out-of-focus background) then the area behind the subject does not cause your eyes to become distracted.

Whether you are a painter or a photographer you are an artist.  Think like an artist and your work will show.


Jason is a photographer who captures light, nature, and people with pizazz and joy. For more about him and his photographic adventures, please visit his website by clicking on his website link Eldridge Studios.

Smiles, 
Angeline Marie of 
Angeline Marie Fine Art
Facebook Page for Angeline Marie Fine Art

Tuesday, February 22, 2011

How to Keep Your Encaustic Painting Happy


How to Keep Your Encaustsic Painting Happy - and the Owner, too!

1. Encaustic paint has a curing time, just like oil paint. It can take a few months before the paint is truly dry.

2. Keep the painting in indirect sunlight to avoid any color fading over time.

3. Keep the painting between in temperatures between 35 and 120 degrees Farenheit. Trunks of cars, attics, basements, and above the fireplace may not be ideal places.

4. The wax may be right up to the edge of the panel, which means dropping, hitting, or abusing the painting may cause the paint to chip. Scratches may  be repairable…but why risk them?

5. The best frames are "float frames," or no frame at all if the painting already has a cradle. For more information about float frames, click here.

6. If your painting needs to be packed, cover the surface with a piece of parchment paper. The wax will not stick to it, which means minimal damage.

7. If the painting gets dirty, use a dry soft cloth (t-shirt, pantyhose, chamois) to gently rub the surface of the wax. This gently rubbing will also remove shallow scratches. Do this only when the wax is cool to the touch. If there are a lot of textures, a soft make up brush can remove dirt and dust.

Sources researched for this post:


Bianca with her New Beginnings cards, January, 2011.


Smiles, 
Angeline Marie of 
Angeline Marie Fine Art
Facebook Page for Angeline Marie Fine Art

Thursday, February 17, 2011

Seminart by Life Is Art at Gab Studios by Julia K. Wakefield

Julia K. Wakefield at the beginning of the presentation.


When Life is Art sent the seminar information about a month ago, this past Tuesday night was immediately reserved for my attendance! The seminar was How to Get the Media's Attention by Ms. Julia K. Wakefield. I had the opportunity to meet Julia at another event held by Life is Art last year, therefore already knew it was a quality presentation and made effort to attend. Wynwood District's GAB Studio served as gracious hosts to all guests.


Julia kept the presentation short, sweet, and simple to understand. Media included social media such as Facebook and blogs. Everyone was given a photocopy of templates to use as needed. Timelines, how-to, and reasons for how to do things were given without overwhelming the crowd. Even though the crowd was diverse in knowledge, everyone left with useful information.  


Before we knew it, the hour presentation was done. What lingers are the notes and plans for using everything learned from Julia. 


Your turn: Which seminar have you found useful? What information do you still reference from that event?


Smiles, 
Angeline Marie of 
Angeline Marie Fine Art
Facebook Page for Angeline Marie Fine Art

It pays to wear bright pink with a smile! For more about, visit Life Is Art. Credit for the photograph is on the photo itself.  

Thursday, February 3, 2011

Kim Bernard's the Next Level Encaustic Workshop Part 2


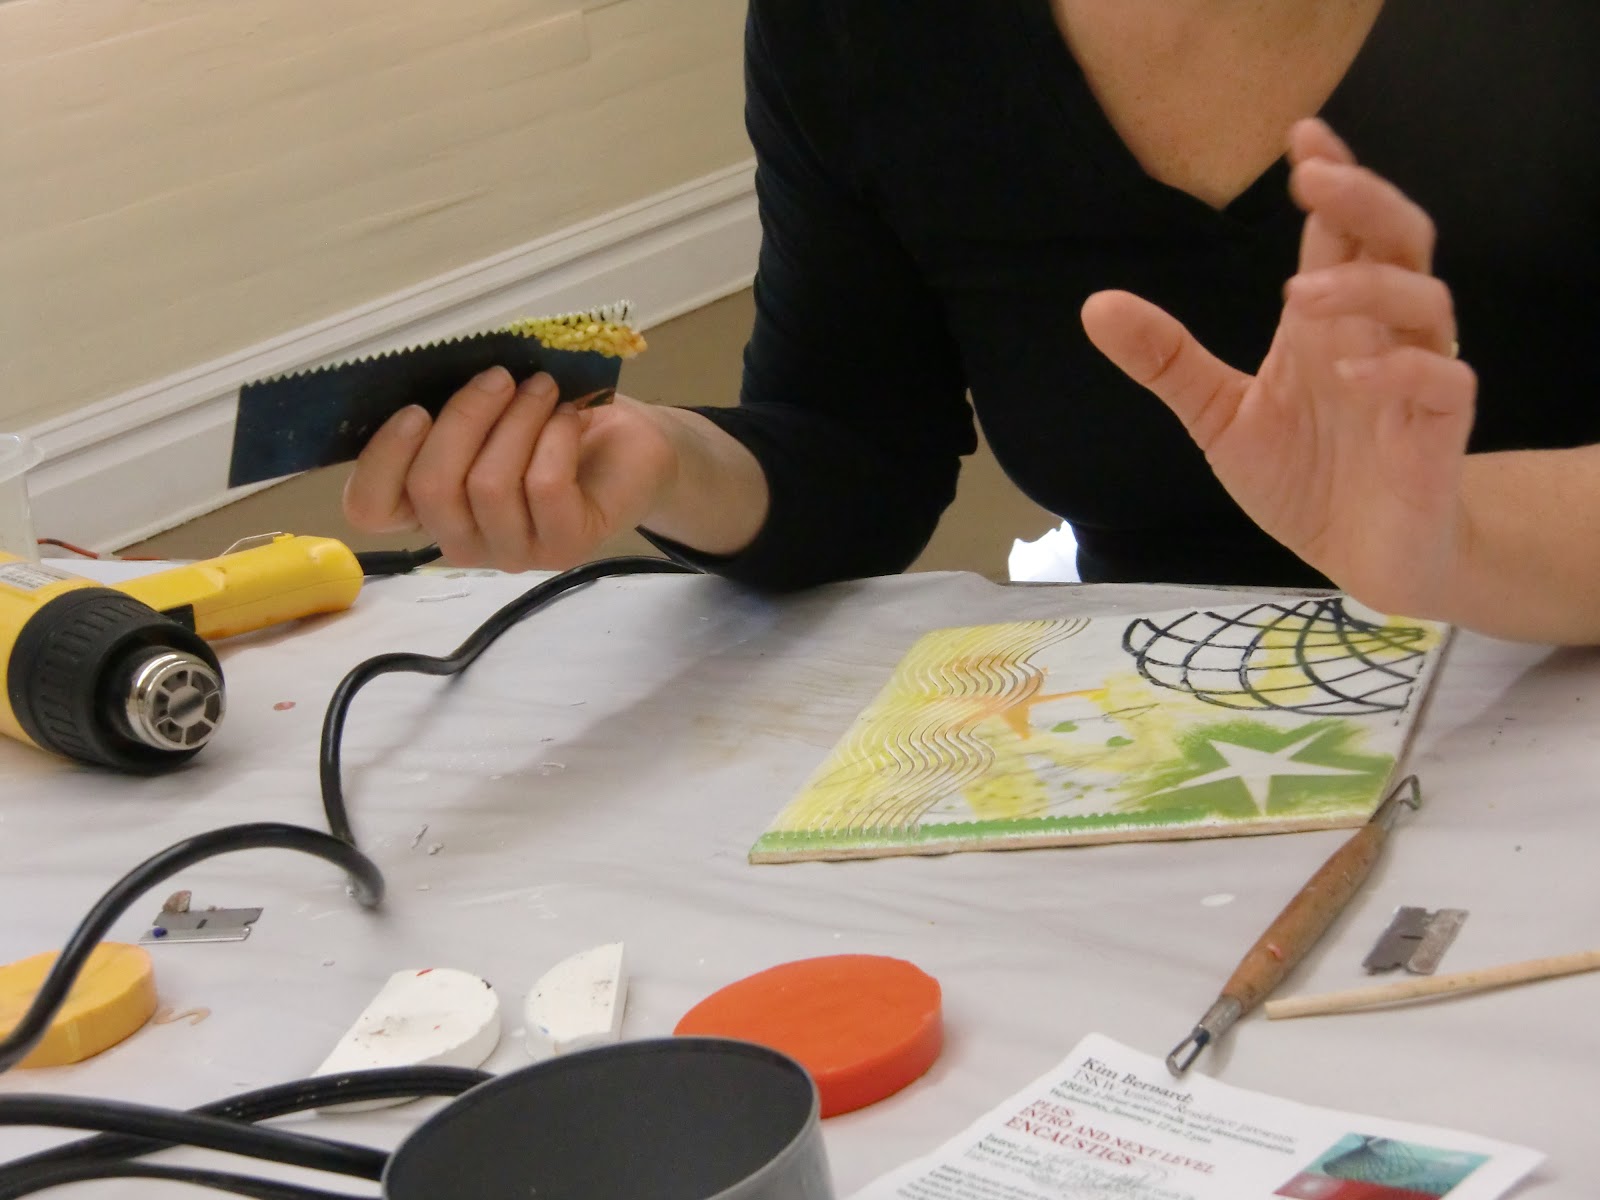
As mentioned in an earlier blog post, these are the photos from the second day of Kim Bernard's workshop. The content belongs to artist Kim Bernard. The photos belong to my library for use as memory joggers and reference.
Kim showing a technique.
Thankfully, masking tape is cheap!

Kim explaining the use of tools.


Special thanks to Mama and Andy, who always encourage and cheer me!

Smiles, 
Angeline Marie of 


Links related to this post:
Kim Bernard's the Next Level Workshop at the Studios of Key West

Angeline's Art 

More of Kim's demos.

My attempt at a technique. This one needs a lot of work...but lots of fun!

This is me, using multiple techniques that now I understand!

Encaustic Workshop Adventure in Key West  

Encaustic Video

Tuesday, November 30, 2010

How to Question an Artist - in time for Art Basel Miami Beach


Learn how to start a conversation with an artist before asking a conversation killing question.

This is published just in time for Art Basel Miami Beach, 2010.


Learn what three questions to avoid asking an artist. Learn what to ask artists at art fairs, speaking events, gallery openings, and other places. You will impress your friends and family and make a new artistic friend if you are willing to be guided by this speech, "Avoid Asking an Artist!"

If you have trouble viewing the video here in the blog, please click on this sentenct to go directly to Angeline Marie Art Youtube Channel.

Smiles,
Angeline Marie of
Angeline Marie Fine Art

Tuesday, November 9, 2010

How to Care for Paintings on Paper

I subscribe to ARTtalk ArtPourri Tips, and they had a wonderful article about how to take care of paintings created on paper. As an artist, paper is one of my favorite painting surfaces because of the surprises and versatility of the fibers. It can be challenging to care for and frame a painting on paper, so here is how:

Artwork Preservation: Protecting Works on Paper
For original posting of this article, please click this sentence or search ARTtalk Art PourriTips.

It is a most unfortunate fact that the ultraviolet light produced by any light source can cause a slow, steady decline in the color, vibrancy, intensity and overall appeal of artworks created on paper. While oil and acrylic paints might change colors very slowly, works on paper done in watercolor, for instance, fade at a rate that is in direct relationship to the quantity and brightness of light exposure.

If you expose a watercolor painting done on any professional quality paper (acid-free, archival) to a bright, intense light source, you will see that the colors begin to change and fade very quickly. Since very few of us choose to display our artworks in a strong light, the damage created by the ultraviolet spectrum of the light is usually unnoticed. Because the fading and color changes occur over a long period of time, we tend to grow accustomed to the diminished colors and tones.


There are several ways you can work to protect your paper artworks. It is well known that art that is not on display should be stored properly. This usually means an acid-free, archival folder or print box. But, when it comes time to frame and display these artworks, consider selecting a type of glazing that offers protection.

At this time we are fortunate to have several types of glass that restrict the penetration of ultraviolet light. Common clear glass offers limited protection but is much better than forgoing the use of glass altogether.


Non-glare glass is the next step up the protection ladder and offers approximately 44% blockage of ultraviolet light. It is created by subjecting clear glass to an acid dip, causing a slight frost on the glass. Modern non-glare glass is etched on one side only. This one-side treatment eliminates most of the image and detail softening qualities of old fashioned non-glare glass (etched on both sides).


Conservation glass is very special in that it takes a product similar to either clear or non-glare glass to a new level. Conservation glass is coated on the artwork side of the glass and effectively blocks 98% of the ultraviolet penetration. It reflects back the UV with the coating and prevents nearly all UV damage to artworks on paper. Conservation comes in the same two qualities of glass: clear and non-glare. Cost is higher than traditional clear and non-glare, but the degree of protection is over doubled.


The last type of glass that is available is museum glass, which offers both a nearly reflection-free surface and a very high degree of UV protection. This choice would be best for original works or very costly, collectable items on paper.


Acrylic sheeting is a choice preferred by many photographers because it does not cause any tonal changes in the photographs. Because of the silica content, some glass products do have a “color.” Acrylic sheeting is unbreakable and comes in clear and non-glare. Some manufacturers offer a very high grade of material, which offers moderate protection from UV.


In summary, consider the ground upon which your artwork is created. Coat oil paintings with special products created to help block UV and to preserve the luminescence and shimmer of the paintings. But for paper art, use the glazing material that best suits your application and budget. And remember, art that is displayed can be enjoyed every day. It makes a house a home and shares your style with family and guests.


I hope this article helps those that own paintings and other art work on paper. If you have further questions, please leave a comment.

Smiles,
Angeline Marie of
Angeline Marie Fine Art

PS: At the time of this blog post, there are two 1st and 2nd generation paintings listed on eBay for clearance sale painted by me. Please share if you enjoy the listings. Thanks!

Click on the title of interest:
Cat in Sunlight Original Art Painting

Apple, Bowl, Wine Original Art Painting

To keep up with what is posted in my eBay account, please search for seller artistangeline or just click on my user name.

Sunday, September 19, 2010

World Alzheimer's Day - TODAY! Please help...

Please help by signing an online petition to make Alzheimer's Disease a priority. Tuesday, September 21, 2010 is World Alzheimer's Day. 

For those of you watching a loved one's mental health slowly decline, I feel for your pain! My family experienced Alzheimer's effects with my father. For a good book about what it is like, check out The Worst Day of My Life, So Far.This was a book I could not finish reading....


I am not asking for money donations, although that would be great (to the Alzheimer's Association). Just your signature on an online petition would be greatly appreciated.

The link that follows will take you to a site to sign a petition to make Alzheimer's a national priority giving more money for spending. The petition will be presented to the government on September 21 World Alzheimer's day.
http://www.alz.org/petition


It takes less than a minute or two to sign.

If you are wondering if signing the petition places you on an email list, it does. If you do not wish to receive Alzheimer's related email, follow the directions I give here (this works for most email lists):

1. Scroll to the end of the email and find a sentence with the word "UNSUBSCRIBE." Sometimes it is a word by itself.
2. Click on that word, follow the directions given in the windows that pop open. 
3. Your email address will be deleted from that list.

THANK YOU in advance for signing the petition. If you run in any challenges getting yourself removed from the email list, please let me know so that I may help you.

Smiles,
Angeline Marie of
Angeline Marie Fine Art

Friday, August 13, 2010

"How to Paint a Portrait" Video Studios


"You want me to paint a portrait in one minute," I exclaimed to Paul. He admitted that most artists he previously filmed for this task failed miserably. The worst case scenario was that the video would never be published. I can live without the video being published, but found to my surprise that it was!

This video is just hilarious. The person in the portrait looks like no one I know. The painting can be considered an "underpainting," as in the first layer of paint on a canvas. Some traditional painters use this technique of underpainting to begin their art works, no matter the subject. For me, this painting is just the beginning of a portrait and is in no way finished in a minute or so. It will soon, if not already, be covered up with another painting (unless you wish to purchase it, ha-ha).

If you wish to see some amazing portraits, click here to get to Lori Pratico's site. Portraits are her gift to the art world.

What do you think about the video? Comments welcome!

Angeline Marie of

Thursday, January 21, 2010

Attended Presentation: Using Video to Gain Exposure & Build Community: Do It Yourself


Last night at the PressitOn Gallery was extremely exhilarating and exciting. I reconnected with Blanca Caraballo and Elizabeth Chacon, met Facebook friend artist Rosie Brown in person, and made some contacts with other people of other fields. The information given during the meeting from Jessica Kizorek about videos and websites was encouraging and motivating.


Jessica Kizorek is definitely an expert in marketing. I attended the meeting to refresh how to take my own videos and left with many ideas of how to continue incorporating them into my website. There were three main tips of how to make a video:

1. LOOK at the camera lens while videotaping.
2. Have good lighting.
3. Speak clearly and loudly. Make sure you can be heard. Minimize background noise.


Having made a couple of videos by myself, those are great tips to remember when using videos in your website. Jessica made her tips and presentation very funny and informative, with great use of examples of how and when to use videos. My pen couldn’t write quickly enough, and ideas kept me awake last night. I wrote all of my ideas down, so they are captured!


Special thanks to Jessica Kizorek for the book that she autographed about how to take great videos. There is a lot of art work to do, and luckily I enjoy most of the creative process. Videos are creative, too! I have two books are that guaranteed to be dog-eared by the end of June: I’d Rather Be in the Studio and Show Me: Marketing with VIDEO on the Internet.


For more information about future presentations, please click on the supporters of last night’s program:

Life is Art and Association of Women in Communication

If you get a chance to visit PressitOn Gallery, do so. The art was super. Smiles!

Angeline Marie of
Angeline Marie Fine Art

Wednesday, December 23, 2009

Framing: How-To Choose the Color & Style for a Painting

This blog post is dedicated to Mark. You are not the first to ask me these questions, and I am sure you won't be the last. =) This how-to frame is more for canvas. A future blog post will be how to frame a painting on paper, because this one is long enough!


1. Take a good look around the room in which the painting is going to hang. Look at the colors of the furniture, paying particular attention to the woods and metals.


2. Check if the painting is on
   a. stretched canvas with no visible staples on the sides, framing is optional, especially if the sides are painted.
   b. stretched canvas with visible staples on the sides, framing is necessary. A mat is optional.
   c. on paper, glass or plexiglass and a frame are necessary.


3. Take the painting with you to the frame store. A great place that has plenty of choices is Michael’s. Target and Walmart will do well for paintings on paper, but will be challenging for the deeper frames needed for canvas.


4. At the frame store, choose wood frames that match the a color
   a. in the room where the painting is to hang.
   b. in the painting
   c. do chose a non-dominant color in the painting.


5. Pay attention to the style of the frame, whether it is simple or ornate. The more simple, the more attention is given to the painting.


6. Place the painting in the frame, or set it on the glass of the frame. You should know whether you like the look or not. Try to narrow it down to two frames.


7. If there is a customer or store associate near by, ask their opinion of the two frames you have chosen.


8. If you are not sure, buy both frames if the store has a good return policy. What is the worst case scenario? You visit to return one of the frames.


9. For directions on how to attach the frame to the painting as well as more, please visit the following links:


How to Choose a Frame


How to Choose a Mat Color


How to Frame a Painting on Paper (Mark, for the paintings you have, this will work, too.)


Smiles!


Angeline-Marie of
Angeline Marie Fine Art
Related Posts Plugin for WordPress, Blogger...